Styling A Note's Contents

It's very easy to transform the look of a plain note's contents by selecting the text you want to
change,
and
then clicking on one or more of the style components on the right hand side of the Note's Window.
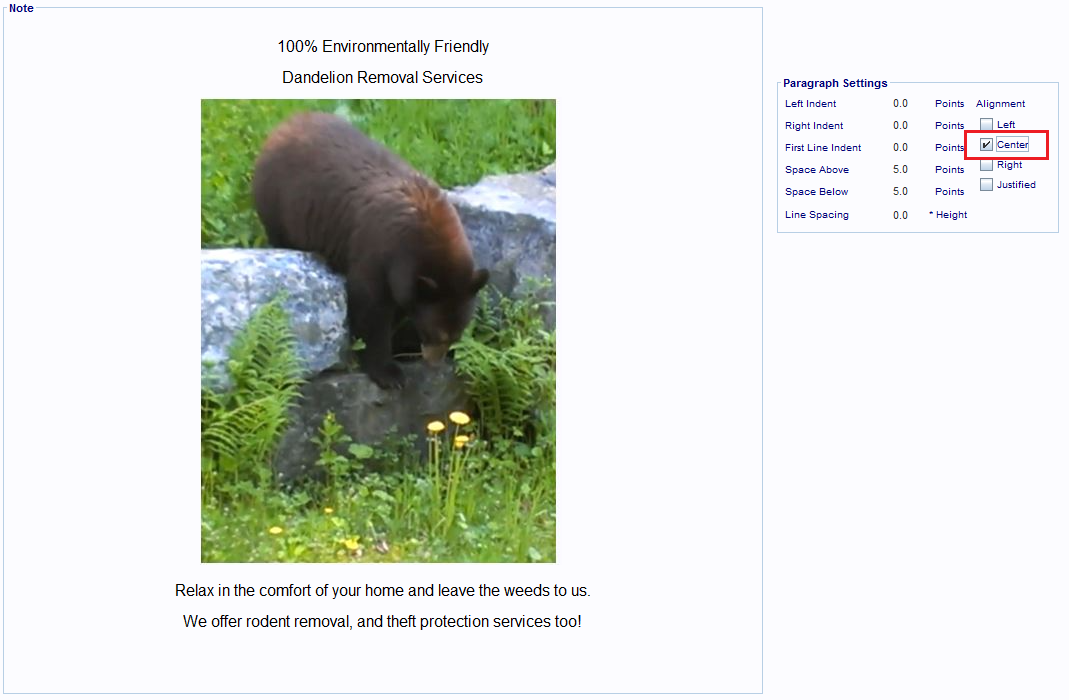
In this demonstration I'll show you how to use several of these style components to transform a plain
note,
such
as the one in the image above, into a styled note, like the one shown here.
Using The Styles Panels To Change The Look Of A Note's Contents
Only the Notes Window can be used to edit and style a note's contents, so the first
thing you need to do is locate and open the note record you want to change.
On the right hand side of the Notes Window are a set of "Style Settings" panels.
You
use
the
style
components in these panels to change content in the note.
The names of each panel, and the style components you see in them, clearly indicate what their used
for.
Typically, the way you'll style a note's content is by first selecting the content that you want to
change,
and
then start clicking on the style components that will change it.
In this image all the selected content is going to be centered in the Notes Panel after
the
Center
check box is clicked on in the Paragraph Settings panel.
As you change the settings of a style component, the changes are made to the content immediately.
As
soon
as
the
Center check box was clicked on, all the selected content in the Note panel was centered.
You can make changes to unselected content too, but Font Setting components won't make those changes
until
you
start typing in new text.
However, Paragraph Setting components will change the underlying paragraph
immediately.
For example, in this image, the displayed text is 24 points in size.
The cursor is at the end of
the
paragraph and nothing to the left of that cursor has been selected.
If I change the current font size from 24 to 14 points, that change does nothing to the text to the
left
of
the
cursor, but it will change the font size of any new text that gets typed into that paragraph,
including
new
paragraphs that get created when you press the Enter key on your keyboard.
Now that you've seen the 'basics' on how to make style changes to a note's contents, you've probably
learned
enough to just start styling your own content.
The remainder of this web page is going to go into a lot more detail though, by showing you how to
transform
the
note on the left side of this image, into the note you see on the right side of the image.
Applying Font Settings
Font settings can be applied to selected text, or any new text that will be entered into the
paragraph
the
cursor
is currently inside of.
I'm going to show you how to change the un-styled note's header (image's left side) to a styled
header
(image's
right side), next.
Start by selecting the content whose font settings you want to change.
To change a font, you click on the down arrow on the Fonts drop down box and you see a list of all
the
fonts
installed on your computer.
Scan the list for the font you want and then click on it to apply it.
The font style changes for the selected text.
Now I want to increase the size of the selected text, to 42 points (a point is 1\72 of an inch, or
approx
3.5
mm).
So, I type 42 into the Font Size component, and the selected content changes to that size.
Applying Paragraph Settings
Now I want to play around with the Space Above and Space Below settings for the note's header.
Then
I'll
change
its color from black to a shade of green, in the next section.
What I want to do, is bring the top sentence very close to the top of the page.
Then, bring the
second
sentence
up underneath the first one, as closely as I can get it, without it covering any part of the top
sentence.
The
finished result is shown in this image.
I start by selecting the two paragraphs that make up the header's contents.
Next, I've changed the Space Above setting to -28 points.
The negative value move's content upwards.
And,
I've
changed the Space Below setting to 19.
The result is shown in this image.
Now that I have my top two sentences where I want them, I don't like the amount of space between the
image
and my
second sentence.
So, I'm going to change the Space Above setting for the paragraph that image is sitting inside
of,
so
that
the image moves upward.
To do this I've just clicked to the right of the image, to put my cursor there.
Now that the cursor is in the image's paragraph, I go into the Paragraph Settings panel, and change
the
Space
Above and Space Below settings for the image's paragraph.
The new settings are Space Above -40 and Space Below 10.
The image shows the changes to the gap
size.
Changing Color Settings
Now, I want to change the foreground color of the note header from black to a darker shade of green.
To do that, I select the two header paragraphs again and then I click on the Foreground style
component
in
the
Font Settings panel.
A Color dialog box open up. This dialog box's tabs, offer many different and advanced ways, to create
and/or
choose a color.
I'm going to keep things simple and just choose a shade of green from the Color Swatches panel.
In
the
dialog
box's Preview panel, you can see a lot of different ways that color will look.
After I clicked on the swatch color I wanted, and then clicked the OK button, the dialog box closes
and
my
selected text changed to the new color.
Finally, for the two sentences below the image, I just wanted to make their font size 20 points, and
reduce
the
space between them.
The image shows the result of the changes, and which Style Components were
modified.
Now, my original, plain looking note's contents have been made to look like a poster.
All I had to do to achieve this transformation was select some text, and click on Style Components
until
I
got
the look I wanted.
Creating, Modifying, And Applying Styles To The Note's Contents
The Styles panel on the right hand side of the Notes Window makes it possible to create a new style,
that
has
all
the settings of something you've already styled on the page.
After this style is created, you can apply it to new content, instead of having to click all the
required
style
components to get the look you want, every time you want it.
For example, to create a style called Enviro-Header, that will have the same style settings that are
used
in
this
note's header, do the following.
Click anywhere in the header's top sentence.
The Font and Paragraph panels change their style
components,
so
that
they display the settings for where the cursor is located now.
Now click on the New Style hyperlink in the Styles panel.
A Style Name dialog box pops up on the screen.
Enter the name of the new style
into the dialog box and then click the OK button.
The dialog box closes and a new style exists, with the settings that are on the screen
right now.
Now, you can apply this style to selected content, or to the paragraph under the current cursor
location
by
simply clicking on the down arrow
in the Style Names combo box (if it's name is not displaying already), and selecting the name of the
style
who's
settings you want applied.
To demonstrate how this works, I'm going to select the top two sentences again, and apply the Default
Style.
This image shows that the selected text has changed its style to the Default Style's settings.
Now to get our Enviro-Header style applied again, all we have to do is select it from the Styles
panel's
Style
Name combo box, click on it and our style settings are back.
As you can see, the content is now applying the Enviro-Header style's settings.
Changing An Existing Styles Settings
It's easy to modify a style's settings and save those settings to. To do that, select some content
that
has a
style applied to it. Then make the changes you want to that content in the Font Settings and/or
Paragraph
Settings panels. Then in the Styles panel, click on the Change Style Settings hyperlink.
For example, this image shows the following changes that were made and saved to the
Enviro-Header
style.
Any
new content that has the Enviro-Header style applied to it, will now have these new settings.
Note:
When you change a style's settings, as was done above to the Enviro-Header style, those changes
don't
immediately happen in all the other content in the note that were already "tagged" as using the
Enviro-Header
style.
They'll keep their original settings, until you select their content and reapply the style to
them.