Linking Computer Files To Database Records
About Data File Link Records
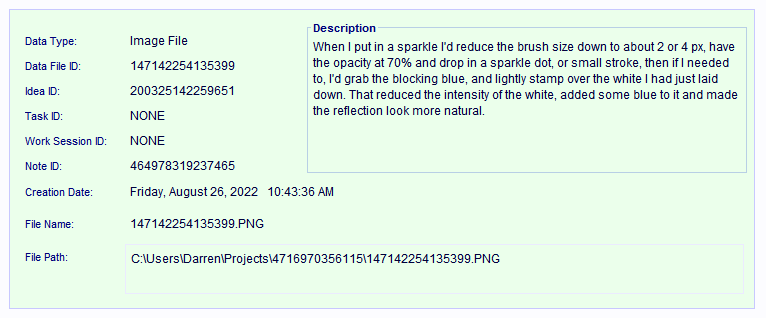
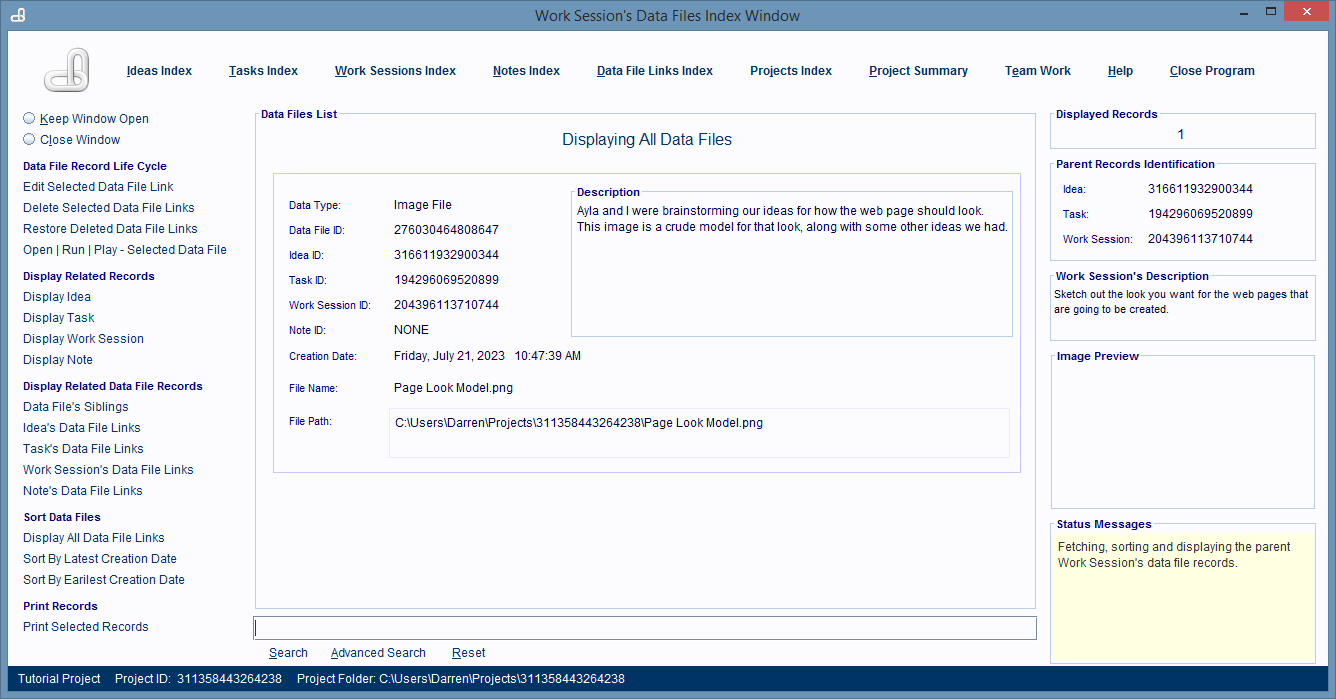
Data File Link records, like the one in this image, are used to represent a link between a computer
file and a group of database records. By linking computer files to database records the software takes
over the job of remembering where
computer files are stored, so you never have to.
Data File Link records can only be created for and linked to Idea, Task, Subtask, Work Session, and Note
database records.
The instructions shown in this web page show you how to create Data File Link records for Idea records. But,
what you learn here
can be applied to creating them for any Task, Subtask, Work Session, and Note records too.
How To Link Computer Files To Database Records
Computer files of any type and amount can be linked to any Idea, Task, Subtask, Work Session, or
Note records. When a file is linked to a specific record the software automatically links it to
all of that record's parent records as well. This allows all of these records to track that file
and makes it very fast and easy to locate and load it again in the future.
This image shows a Word Processing file that's linked to a note record directly, but it's also
linked to all of that note's parent record too and all of them are aware of it and can easily
locate and load it in the future.

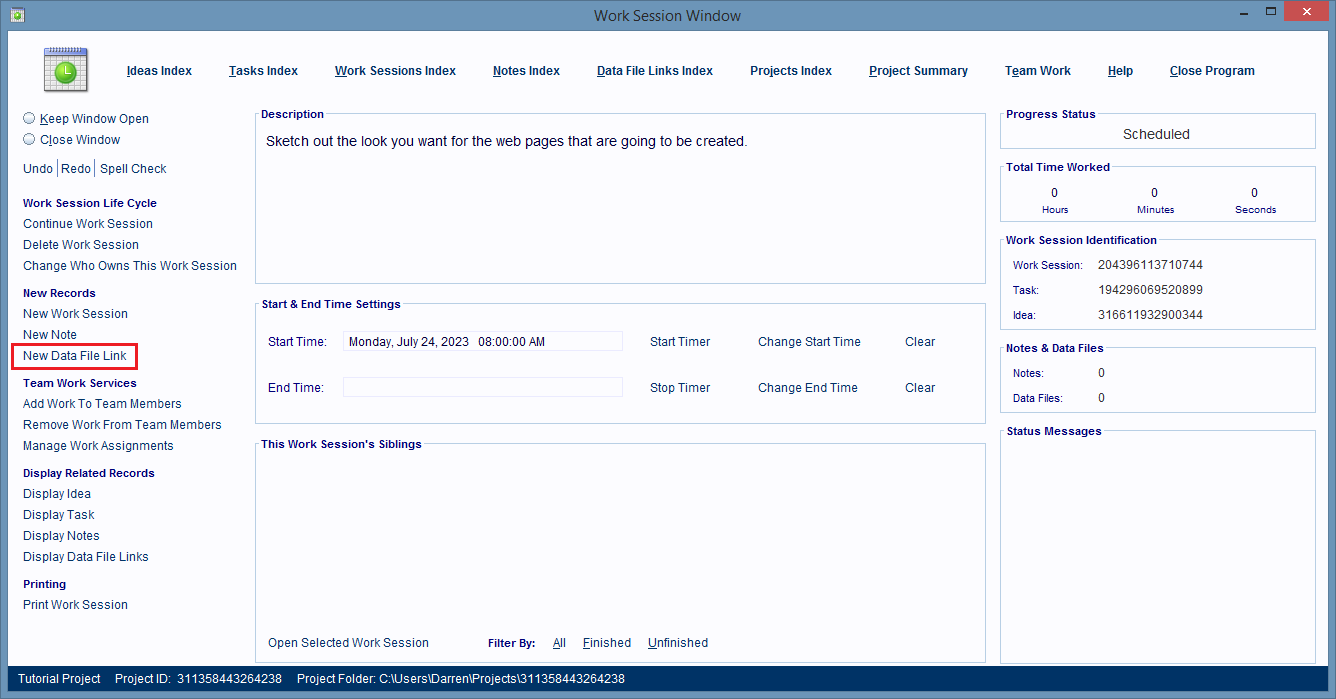
Before you can link a computer file to a database record you first need to be in a window that's
working
with the record. In this demonstration I'll be linking computer files to a Work Session record. Idea,
Work Session, and Note records tend to be the most common types that file's are linked to directly.
To start the linking process just click on the New Data File Link hyperlink on the left side of the
window displaying your record.
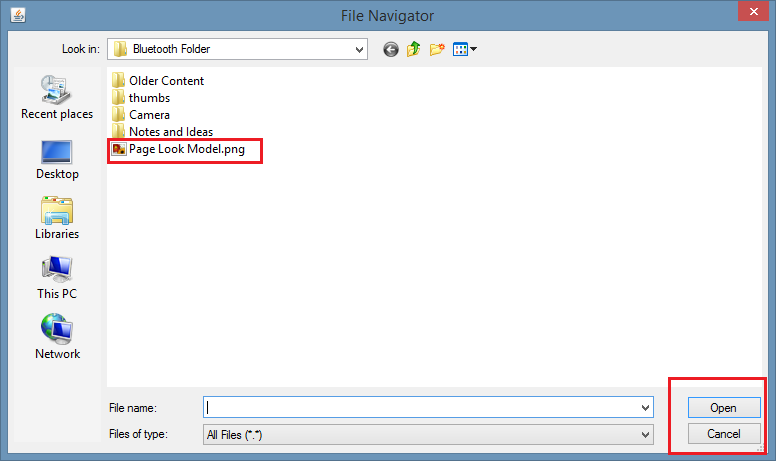
After you click that hyperlink a File Navigation dialog box is displayed. Use it to navigate to
and
select the files you want linked to the database record.
Then click on the Open button and the
dialog
box closes.
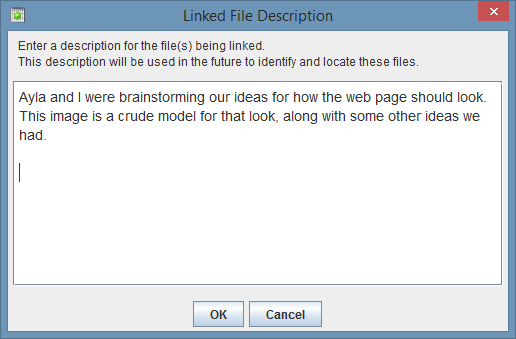
A new dialog box opens and this one is asking you to provide a description of whatever is
important to know about the files being linked.
Every file being linked will get its own Data
File Link database record to represent it, and the description you write here, will be the
contents of those records description fields.
You can write as much content as you want in this
dialog box. When you're done click the OK button and it'll close.
A new dialog box opens and this one asks if you want to link to the original files, or to copies of
them,
placed inside the Project Folder. 99% of the time it's best to answer 'Yes' to this question and
link to
copies of the files. Mainly because the software provides a Project Backup system that backs up
everything in the Project folder, so if your files are in there, they're backed up, and always
available.
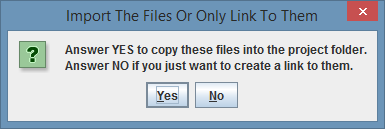
After you click Yes, or No, this dialog box closes and the linking process is done.
The window you're working in will tell you how many files were linked and it'll add it'll
increase its current total.
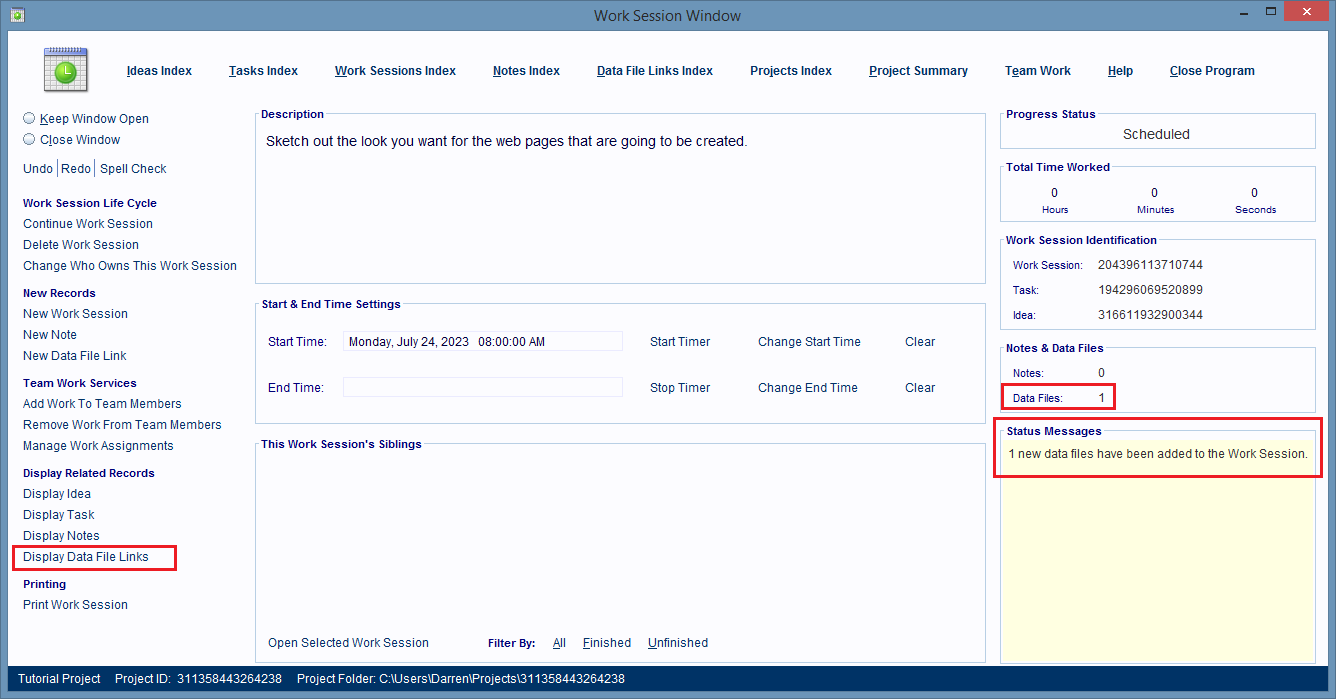
If you want to see the files owned by the Work Session then just click the Display Data File
Links hyperlink (image above) and a new, 'index type' window will open and show them.
You can use an 'index type' window's Search panel (it's beneath the records list) to do normal
and advanced keyword searches for
records displayed in that window.
Summary
Linking computer files to database records is easy.
- Open the Idea, Task, Subtask, Work Session or Note record you want to link the files to.
- Then click the New Data File Link hyperlink, it's found on the left side of the window displaying the
parent record.
- Use the displayed File Navigation dialog box to locate and select the files you want to link. Then click
the Open button to start linking the files.
- In the Description dialog box, enter a description for the linked file(s) and then click the OK button.
- In the Import Files dialog box, click Yes or No to tell the software to link to copies of the files, or
to the
originals.
You're done. The files are linked to the parent record and in the background each file has a Data File
Link record that's representing it and all the major records it's linked to.